How To Tie A Kelvin Knot
Unlike most knots, the Kelvin knot starts with inverting the tie. A finished Kelvin knot is slightly asymmetrical with tidy look. Tie a perfect Kelvin knot with one of the ties from Rogier.
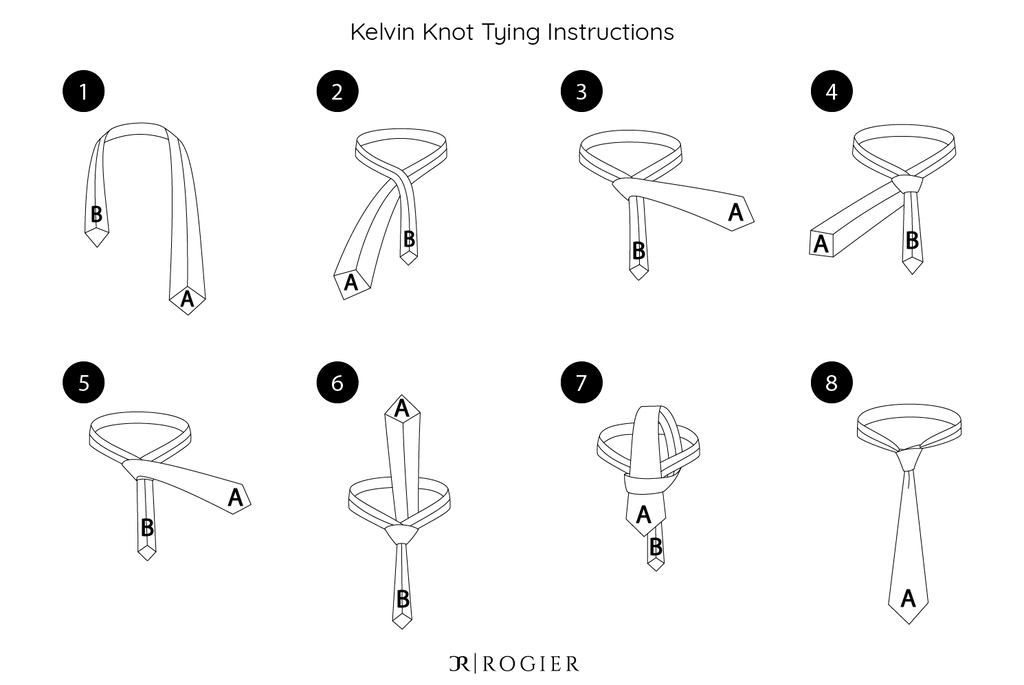
Tying A Kelvin Knot Step By Step
The Kelvin knot step-by-step guide below provides more detail about how to perform each step correctly.
|
|
Step 1 Start tying with the tie backside of the tie facing away. Place the wide end on the right side and the small end on the left side. When tying the Kelvin knot, you only move the wide end (labeled as A). |
|
|
Step 2 Move the wide end under the small end towards the left. |
|
|
Step 3 Move the wide end over the small end toward the right. |
|
|
Step 4 Move the wide end under the small end towards the left. |
|
|
Step 5 Move the wide end again over the small end towards the right. |
|
|
Step 6 Move the wide end up and into the neck loop. |
|
|
Step 7 Move the wide end down through the front loop. |
|
|
Step 8 Tighten the knot and adjust if necessary for a perfect Kelvin knot. |


Learn More Tie Knots
There are many ways to tie a tie. Try one of these other knots to create new looks and try new styles.